Whether you built your own android app or followed our guide on how to reskin mobile apps in 20min and make money from it, we’ll show you (step by step) how to publish your app to Google Play Console.
Step #1: Create your Google Play developer account
To create your account, follow these easy steps:
- Go to Google Play Console
- Login with your Gmail account
- Choose “Yourself” if It’s for personal use
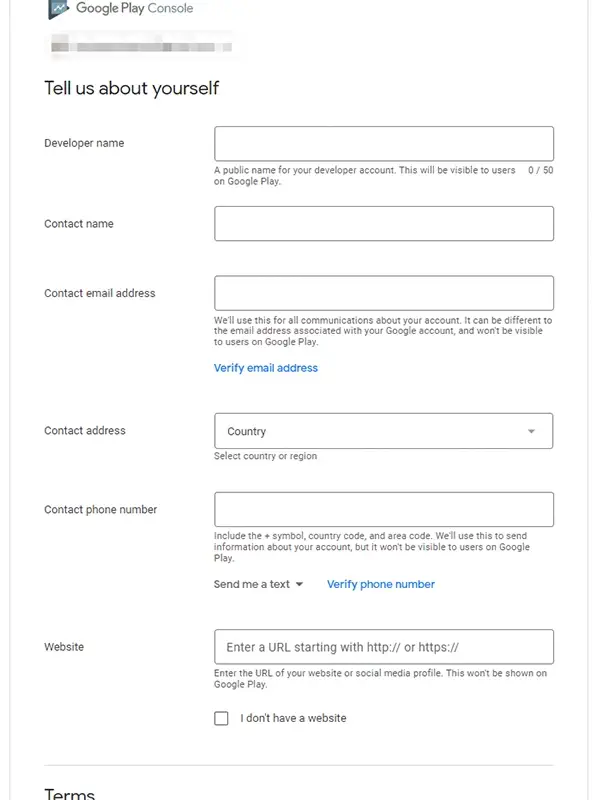
- Enter your information.

- Verify your phone number and email address (same page)
- Read and accept the terms
- Click “Create account and pay”
- Complete your purchase by paying the one-off $25 registration fee
- Click “Go to Play Console” once the account is created
Why does Google charge a $25 fee to create your developer account?
Google charges the 25 USD registration to encourage quality apps on the Google Play Store, If there was no registration fee for publishing Android apps, the apps’ quality would definitely be terrible. Also, Google’s one-time fee isn’t much compared to Apple’s 99 USD annual fee (App Store Developer).
Important: You may be asked to verify your identity to complete your developer account registration. If they can’t verify your identity, the registration fee won’t be refunded.
Step #2: Create the App
Now let’s create your first app, but before that, make sure that your app complies with the Google Developer Policies.
- Head to the “All apps” tab in the menu.
- Click “Create app”.
- Choose your app’s default language.
- Choose if It’s an app or game/free or paid.
- Read and accept the declarations.
- Hit “Create app”.
You will be taken to the app page, where you should add some infos about the app.
Step #3: Set up your app
Now let’s provide information about your app and set up your store listing. Under the “Set up your app” section, click “View tasks”.

Now you need to visit each link from these, and answer or select the right answer (simple tasks):
| Task | What is it about |
|---|---|
| App access | If all functions in your app are available without special access, or not. |
| Ads | If your app contains ads, or not. |
| Content rating | Your app’s category and a small questionnaire about the app’s content. |
| Target audience | The target age, and if your app or store listing appeal to children. |
| News apps | Whether your app is a news app, or not. |
| Select an app category and provide contact details | Again with the category, and your contact details. |
| Set up your store listing | App’s details (visible to the users on the Play Store). |
The last task (store listing) is very important. It contains the most important information, such as the App name, Short description, Full description, Screenshots, Graphics, App icon, Videos.. etc. This helps for app store optimization (ASO) and gives the users more details about your app before downloading it.
Useful infos:
- Short description length: 80 characters.
- Full description length: 4000 characters.
- App icon size: 1 PNG 512px x 512px (1MB max).
- Screenshots: 2 to 8 screenshots, 320px to 3840 px, JPEG or PNG.
- Feature graphic: 1024px x 500px, JPEG or PNG.
Step #4: Publish your app on Google Play
Again in your app’s dashboard, scroll down to “Publish your app on Google Play”, and click “View tasks”.
- Select countries and regions (selecting all countries is recommended).
- Create a new release.
- Sign your app by clicking the “Continue” button.
- Upload your file (either the .aab (app bundle) or the .apk format).
- Fill in the release details (normally it’s done automatically after the upload).
- Click “Save”, then “Review release”, and finally “Rollout”.
That’s it, if the review process goes well (3 days max), it will be soon available in the Play Store.
We hope these instructions will help you to get through the process easily, if you have any questions or concerns, just leave us a comment down below.
