
Automation saves time and energy.
Creating a single post or page in WordPress can be easy, but, is it the case for creating multiple pages? In this guide, we’ll show you step-by-step how to mass generate posts and pages (with real content, not only some empty no content pages) in WordPress, and automate your workflow with just a few clicks.
Our experience: we are talking about hundreds, thousands, and even hundreds of thousands of pages that can be generated using this WP plugin. We personally used it to generate 100k+ pages with 100k+ different keywords (longtail keywords collected using Semrush’s keyword magic tool). This helped us boost our SEO traffic. Imagine getting just 1 visit/page per month… you can easily hit 100k visits per month if you have 100k pages on your site. But actually, there were even some pages with 300+ visits. We started then optimizing pages with the most traffic to create some unique content and even boost its SEO more.
How to bulk add pages & posts in WordPress?
MPG plugin is a WordPress plugin, that allows you to easily create a large/unlimited number of unique posts/pages with unique URL slugs, and which are also SEO optimized… using a data source (something like Google spreadsheet .csv / Excel file .xlsx). A great alternative to the Bulk Page Creator plugin.
MPG can also be used in E-commerce sites to create product pages based on existing product data.
3 easy steps to get started with MPG:
- Create your content source – e.g. a CSV file.
- Create a template page that will determine how your content is displayed.
- Create a new MPG project.
Step #1: Create your content source
Let’s prepare your CSV file (.csv format is best for page speed)
- Go to your Google Drive → New → Google Sheets.
- Now put your data/keywords there.
- Remove unused columns and rows (optional but recommended).
- Save it as a CSV file (File → Download → Comma Separated Values (.csv)).
Here is an example of how to put your data (the first row is what we will be using as shortcodes later):
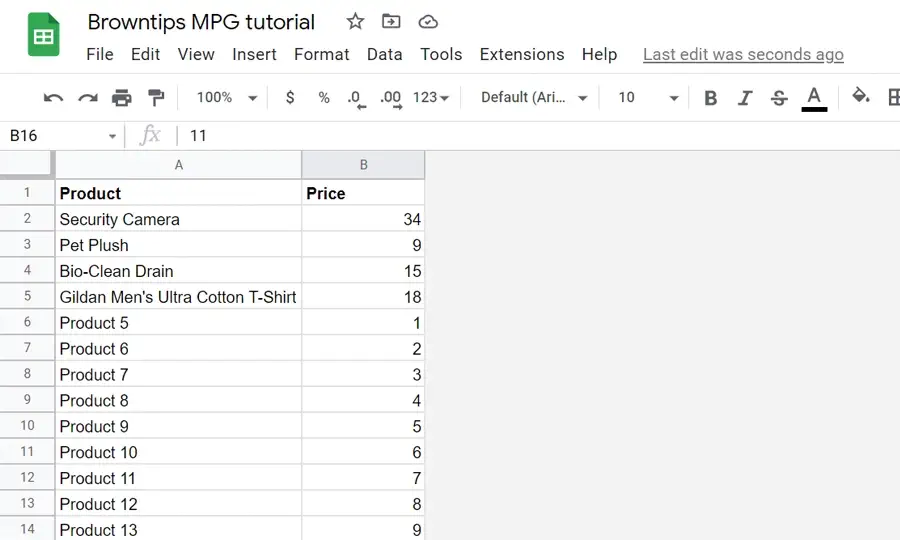
You can have as many rows as you like.
Step #2: Create your template
After installing and activating the MPG plugin:
- Add a new page or post.
- Add your static content/paragraphs, including images, videos, and links.
- Insert your Shortcodes (dynamic content).
- Save your page.
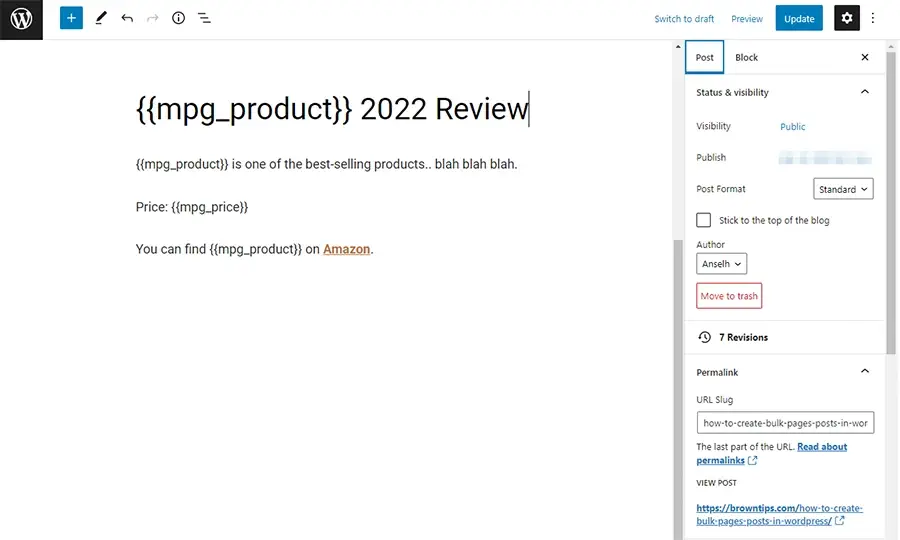
From where to get the MPG shortcodes? You can simply put your keywords in this format {{mpg_keyword}}, replace “keyword” with yours from the first row in your file. Also, MPG will create them for you after you upload your file.
Here’s an example of what a page template looks like
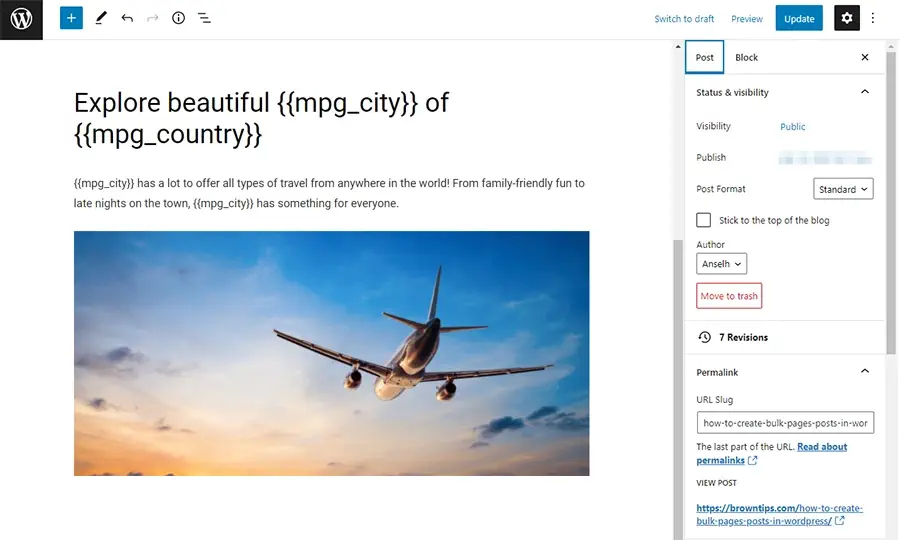
Another example with different keywords:
Step #3: Create a new MPG project
The last step, putting it all together:
- In your WordPress dashboard, navigate to MPG → Create New +.
- Click “From scratch”. You also have access to a lot of different pre-made templates that cover several niches.
- Name your project.
- Choose the entity type (post or page).
- Choose the template you created in step 2.
- Click “Save changes”.
- After saving, now you can upload the source file.
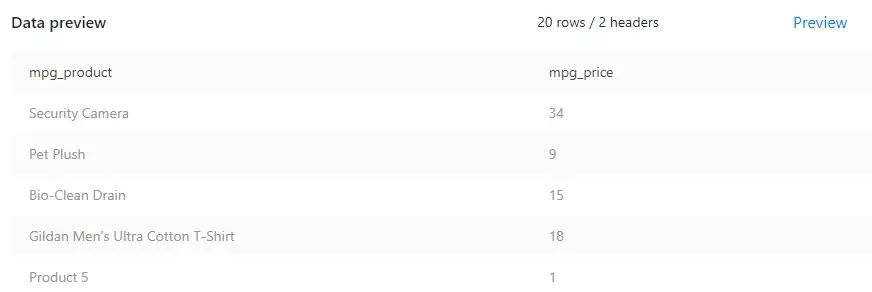
- After uploading your file, you’ll have a data preview:
- Choose your URL format by inserting a shortcode. Choosing the main keyword is recommended (to get unique/SEO-friendly URLs), you can also select multiple shortcodes:
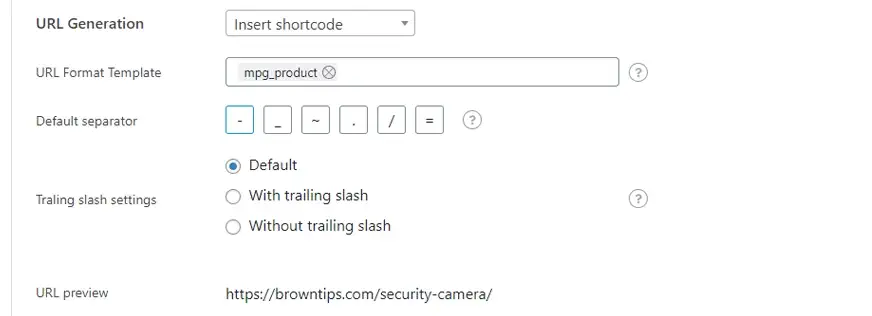
- Click “Save changes” again.
- After saving, you’ll have the shortcodes tab, you can copy and replace them in your template if you haven’t already done that.
- Now, generate your sitemap, after giving it a name, in the Sitemap tab.
- Submit your sitemap to Google Search Console, so the links can be crawled and indexed.
Here is an example of what your final page/post should look like (this is the first URL, generated from the CSV file we created for template 1):

Is MPG a free or a paid WP plugin?
MPG is a freemium WP plugin, with their free plan you can create 1 template, up to 50 pages generated. While their premium version of the plugin will provide you with more features, unlimited templates, and unlimited pages/posts.
Thank you for visiting Browntips.com.
